Tuesday, February 26, 2013

Scallop Envelope Easter Basket

Next month we get a visit from the Easter Bunny,
but why not start a little early with a cute basket
with yummy chocolate eggs?
 
 
The pretty ribbon is the two-tone ribbon from the Spring Catalog.
 
 
I made this basket with the Scallop Envelope Bigz die
from the annual catalog.
 
You will cut two envelopes for each basket.  The inner
part of the basket is just a strip of paper, cut 7 3/4" long and
scored at 2 1/4" and 5 1/2".  Once you put the two envelope
flaps at the bottom, it becomes clear how to adhere
the strip of paper to complete your basket.
 
 
The scallop flaps will fold outward. Then you will
make your handles using the oval framelits from
the Spring catalog. I used the third biggest (4" X 3") and
the second smallest (2 3/4" X 1 3/4") and held them in
place with a sticky note before running through the
Big Shot. Once you get your oval cut, then you
cut that in half for your two handles.
 
I secured the flaps down and attached the handles
with tiny brads on each side. 

 
A view from the top.
 
I know I didn't go into a really good step-by-step tutorial ...
so please leave me a comment if you have any
questions, and I'll be happy to respond. :)

Tuesday, February 19, 2013

Lovely as a Tree

Happy Monday Tuesday!  Glad to have the three-day
weekend, but it does seem like Monday!
 
Today's card is a fun and simple technique.  It's a
triple-pane card that looks like some artwork
you might find on a wall!
 
 
Start off with your three strips of cardstock, each
measuring 1 1/2 " X 3 3/4".
 
 
Use some repositionable adhesive to adhere
all three strips side by side and flush in
a row to a piece of scrap paper.

 
Now stamp your image onto the three side
by side pieces.

 
Your image will look whole like this:

 
Then remove the three panels from the scrap piece
of paper and permanently adhere them to the
front of your card.

 
Super easy and fun.  You can do this with any large stamp. 
Hmmm... I'm thinking of the mondo Swallowtail butterfly.
I'll have to try that.  What other Stampin' Up! images
come to mind for you?
 

Monday, February 11, 2013

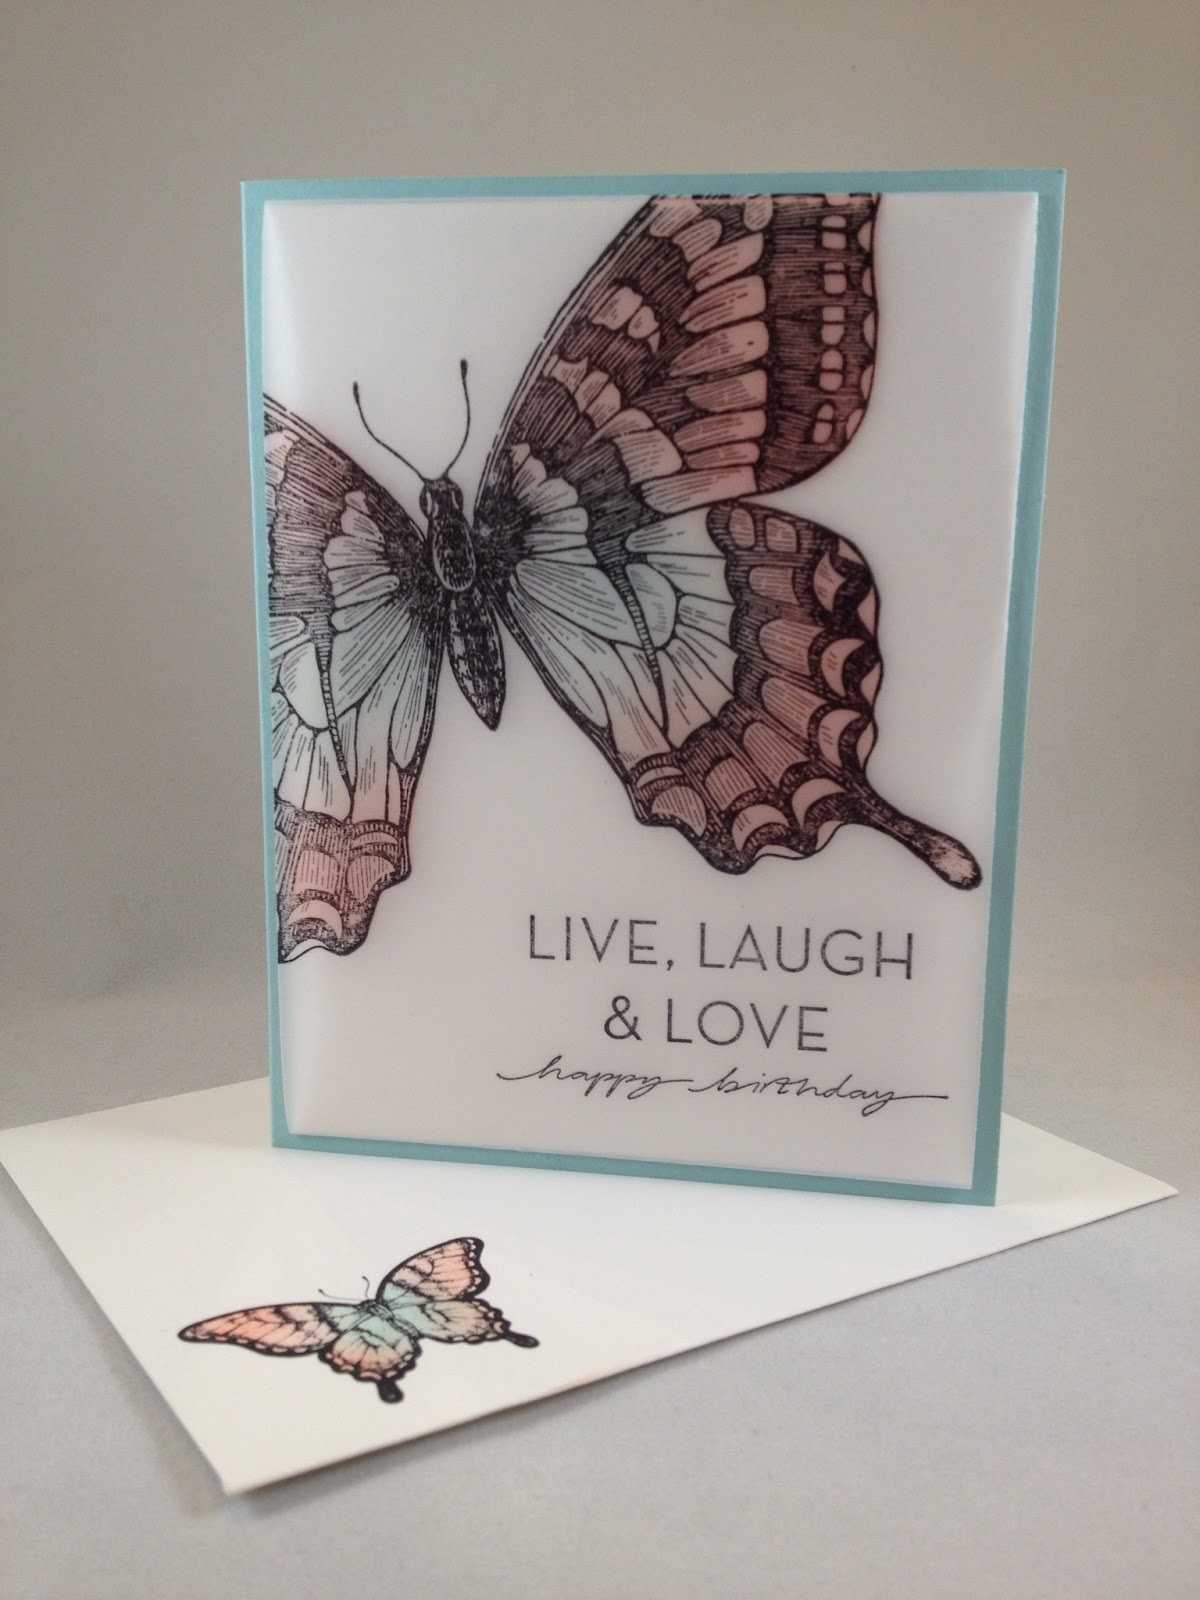
Swallowtail - Big Butterfly

This is one of the biggest stamps I have ever seen!  And
I think it's also one of the prettiest.  I just love its versatility.
 
 
I have made this card using vellum and StazOn black ink.
I cut the vellum to be 7" X 4" and scored at 1 1/2" on each end,
then stamped the sentiment and the big guy on the vellum.

 
Once you have the vellum stamped the way you want it, fold
on the score lines and adhere one end with sticky strip to a 4" X 5"
piece of white cardstock.

 
Now make a mask by stamping the butterfly on half of a
sheet of printer/copy paper and cutting out.


Position your mask on the white piece of cardstock, closing
the vellum over to make sure it lines up perfectly. 
 
 
Once you have it in place, use sticky notes to hold it. Now take
a sponge and Calypso Coral ink and sponge the outer edges of
the inside of your mask. Then take a sponge and Pool Party ink
and sponge the inner part of your masked off cardstock.
 
 
When you remove your mask, the cardstock will look like this:
 
 
Now adhere the top part of the vellum with sticky strip to the back
of the cardstock just like you did before.
 
 
Now you can see your sponge work show through the vellum!
 
 
All you have to do now is adhere the finished butterfly to a regular
size card (4 1/4" X 5 1/2") in Pool Party cardstock.
 
 
The matching envelope was made using the same mask technique.
The stamp set is Papillon Potpourri, stamped the biggest butterfly
in StazOn black ink.  Using the Elegant Butterfly punch, make
a mask with a sticky note and sponge with the Calypso
Coral and Pool Party inks.
 
I'm sure I'll be posting more samples using this Swallowtail. 
Let me know your ideas for uses for it too!


Friday, February 8, 2013

Circles, circles everywhere!

Circles never seem to go out of fashion!  Today's card
is very easy to do and looks fabulous to boot!

This is a standard 4 1/4" X 5 1/2" white card. 
The front card layer is just a 1/4" smaller, so 4" X 5 1/4".
 
I used 5 different sized circle punches and punched the
card layer in a random pattern after I stamped the
"Happy Birthday" sentiment (from the Sassy Salutations stamp set)
and adhered my rhinestones (see tip at bottom). 
 
I then overlaid the
punched layer onto my card and traced around the
punched circles lightly with a pencil so I'd know where
to place my patterned papers (from the Print Poetry Designer
Series Paper Stack in the Spring Catalog).
 
Once I got my patterned papers in place, I adhered the
circle-punched layer with foam dimensionals.
 
** TIP ** I colored my clear rhinestones with a green Sharpie marker.  :)


Thursday, February 7, 2013

Praying for You ...

Today's card is an elegant but simple card.  It looks like it
was professionally laser cut, but it was ye ole trusty
Big Shot machine and Borders Scoring Plate!
 

Here's how to run your card through the Big Shot
to come up with the cut design:

 
Position the largest Labels Collection Framelit die onto the front of your
card, holding it in place with a sticky note so it doesn't shift when
you crank it through.
When you're running it through, stop when you get to the halfway
point of the framelit and reverse the direction in which you're turning
the handle to back everything back out.
 
 
Here's what the front of your card will now look like:

 You may have to trim the edges just a little to complete the cut:


Now you have the fancy design on the front of your card:
 
 
 Now for the coup de grace, use the Borders Scoring Plate to finish up the edge:

Find the design that matches the Labels Collection Framelits dies and
line up the cut on the card in between the plate and the clear overlay.

Emboss with the smallest round tip included with the
Scoring Tool. 
***  Be sure and score from the inside of your card so
the raised scored image will be facing up on your finished card.
 
When you finish and remove it from the template and admire your work,
this is what it will look like:

 Isn't that cool?!  I love the new tool!
 
 
Now just stamp your images (I used the Thoughts & Prayers stamp set),
tie some linen thread around the "bump" on the cut image, and adhere
a 4 1/4" X 5 1/2" piece of Designer Series Paper behind your cut and stamped
front to complete the card and make it standard size.
 
I hope you've enjoyed today's card.  Simply elegant!  Please leave feedback
and ask any questions that you have ... I love to hear from you!


Friday, February 1, 2013

February Best of 25 Years Stampin' Up! Stamp Set

Introducing our February 25th Anniversary Collection Stamp Set!

Best_of_Love_banner

Stampin' Up is celebrating their 25th year by releasing a "Best of Set" each month.  The "Best of 25 Years" Anniversary Collection is a special-edition series of 12 stamp sets featuring artwork from the past 25 years, plus one exclusive new image in each set! Each month will have a different theme.

Here is February's collection.  Of course, it's all about love!
Best of Love stampsSome things to note:
  • All Best of stamp sets will include 3-5 images, including a never-before seen image, and will be priced at $14.95 (clear-mount only).
  • While they are releasing just one Best of stamp set per month (with a new theme each month), ALL of the Best of sets will be available to purchase until March 31, 2014.  So if you missed a month, you can still get one for your collection until that time.
  • A new flyer will be released every month for each new Best of set.
  • You can get the Best of Anniversary Collection sets (no limits) on my shopping website: www.ready4stampin.stampinup.net
AS AN ADDED BONUS!Starting this month, Stampin' Up is including a collector's card and 25-year proof of purchase sticker with every Best of set. Collect six stickers, and send it in to redeem a FREE set of your choice valued up to $14.95! Free sets must be redeemed no later than April 30, 2014. So look for your sticker in this month's set and don't throw it away -- save it to add to the card later!