Tuesday, November 5, 2013

November Blog Hop


Welcome to the Go Stamp It Blog Hop!
I'm so glad Jessica got this up and
running for us this month.
Otherwise, as you can tell,
I haven't been getting around
to blogging lately.  :(

I hope you've just come from Linda's blog.
Click here if you haven't been there yet.
She's sure to wow you!!

So the theme this month is Christmas
gift tags.  I was in an "almost
monochrome mood" and came up 
with this one:


Here's the back :


In person the silver embossed poinsettia is really
stunning on the vellum.  These pictures don't 
achieve the same wow factor.

The tag is cut with the envelope liners Big Shot
die, using the smallest size.  I used the Chalk Talk
Big Shot die to cut the opening for the ribbon.

The poinsettia and sentiment are from
the Joyful Christmas stamp set,
found in the Holiday catalog.

Thanks for stopping by.  Be sure to visit Cali's blog next
by clicking here.  You'll be glad you did!

Saturday, September 28, 2013

Home Decor

Hello!  Thanks for stopping by today!
I'm gonna keep it short and sweet, I promise!

I have started a new club called a "WOW" club.
It has 10 members and runs for 10 months.
The idea is that each month we will make
something to make you go "wow!"  Last
month we did the little "FALL" decor piece
and this month we did a "HOME" piece.

When I create a design, I always wonder,
"Does it need something more?"  "Is it missing
something?"  Please leave your feedback and
let me know what you think.  Thanks!!

Wednesday, September 11, 2013

September Blog Hop


Welcome to our Blog Hop!!
This month's theme is ... BANNERS!  And with
the banner kits in Stampin' Up!'s holiday
catalog, it's easier than ever to create
fantastic banners in no time flat!
 
Before I get to my addition to the hop,
did you just come from Linda's blog?
Loved her banner and the colors she chose!
If you haven't visited her blog, click here to see it.

Okay, now I get to brag on my brand-new grand-nephew ...
or is it great-nephew?  Anyway, my niece just gave
birth yesterday to a healthy baby boy.  He weighs 8 lbs. 10 oz.
and is 21 1/2 inches long.  Big guy, huh?  :)


So in honor of his arrival, I have made a name
banner for his nursery.  My inspiration came from
this beautiful comforter my sister hand-made:

I wanted to use the same colors from the comforter
but keep the banner pretty simple and generic so
it wouldn't clash with the other decor of the nursery,
so here's what I came up with:


I hope he'll like it!

Thanks for stopping by and checking
out our projects.  Now click here to hop on over
to Caren's blog to see her uber cute banner.

Happy hopping and have a great day!


Monday, August 19, 2013

August Stamp Club Project

Today I'm showing you a sneak peek
of tomorrow's Stamp Club project.
I'm really excited about it, and I
hope you and the girls love it too!


I love doing home decor with paper, and really
like it when there's a "wow" factor.  
With Stampin' Up!'s Core'dinations sandable paper 
and of course the beautiful Glimmer paper, 
it makes it easier to create that wow!

If you're interested in joining our stamp
club or attending a meeting just to try it out,
please contact me and I'll be happy to
share the details with you.  We always
have lots of fun and laughter ...
oh, and crafting too!

Tuesday, August 13, 2013

Mixed Media - Canvas

Hi there!  Thanks for stopping by.
Today I have a little 4"x4" canvas art to show you.

This is one of the projects we made at
last Saturday's Stampin' Retreat.

If you missed it, don't worry ... we have
another one coming up Saturday, September 7, 
from 1:00-4:00 at the same location, Comfort Suites
in Roanoke.  We'll be focusing on Christmas cards 
and tags.  You can come make a bunch a few months
ahead of time so you have a little less you have to
stress about during December.  :)

Isn't it fun?  We took a blank white canvas
and painted it with brown acrylic paint.
Once it dried, we applied a layer of Mod Podge
and adhered a square of Sweater Weather 
designer series paper stamped with the
Gorgeous Grunge stamp set for the
splatter effects.  We then adhered
the pumpkin (three ovals) and the
stem and leaves and added another
coat of Mod Podge.  Once that was
all dry, we applied a Naturals button
with some linen thread and a sentiment,
all with glue dots.

This was so much fun to do and really pretty
easy!  I can't wait to do this for 
Halloween and Christmas!

What ideas come to your mind when you think
of this technique of applying paper to canvas?

Monday, August 5, 2013

August Blog Hop

Welcome to our August Blog hop!

This month's theme is Halloween using items
from the newly released holiday catalog.
If you haven't seen the catalog, check
it out by clicking on its picture in the
left-hand margin.

I hope you've just come from Linda's blog
and you love her project as much as I do!
If you missed her blog, see it here.

Here's my addition to our hop:
Aren't the little punkins adorable?  I hope you can see from
this picture that I cropped the front and overlapped
the panel with the stamped image.  Kind of puts a
fun twist on traditional.

And check out the coordinating envelope liner.  :)
It's super easy to customize your envelopes
using the new framelits available in the holiday
catalog.  The set comes with three sizes to choose from, too!

Here's the view with it laying flat.

If you've got time, I'd love for you to stay
a while and check out my previous project
posts.  I look forward to reading your comments, 
too, so don't be shy to tell me how you feel!  

Your next stop on our hop is Caren's blog.
She's super talented, and I happen to know 
that Halloween is her favorite!  Go see her here.


All blogs on the hop:

Thursday, August 1, 2013

Stampin' Up! Holiday Catalog is Live!!

2013 Holiday Catalog (Click links below to open)

It's finally time to order from the Stampin' Up! Holiday Catalog.
There are so many fantastic choices of stamps, paper
and embellishments for
Halloween, Fall, Christmas and winter holidays!
 
I really love the Envelope Liners Framelits Dies and the
Expressions Thinlits Dies.  Oh, and the Gift Bow Bigz L Die ...
I really can't decide on just one MUST HAVE!
 
What's your absolute MUST HAVE (or two)? 
Leave me a comment below ... I want to hear from you!
 

Monday, July 8, 2013

July Blog Hop

 
Good morning!  I am so glad you're here!
I hope you're blog hopping today and just
came from Denise's blog.  If not, be sure and
stop by her blog to see her wonderful project!
 
The July Blog Hop theme is
"Around the World." 
Here's my addition to the hop:
 
 
Okay, so how does this card have
anything to do with "Around the World"
you may ask?  This is the card I'll
be swapping at Convention next
week.  Since Stampin' Up! has demonstrators
from all over the world now who will be
in attendance, I hope my swaps make it to
The Netherlands, Austria, France,
Austrailia, Germany, The United Kingdom
New Zealand ... and beyond!
 
Thanks again for stopping by, and please
be sure and visit Jessica's blog next!
 
Supplies used:
 
Midnight Muse card stock, item #126843
Whisper Wite card stock, item #100730
Midnight Muse Classic Stampin' Pad, item #126860
Clear Stampin' Emboss powder, item #109130
Wild Wasabi Stampin' Emboss powder, item #123224
Rich Razzleberry Classic Stampin' Pad, item #126950
Tangerine Tango Classic Stampin' Pad, item #126946
Wild Wasabi Classic Stampin' Pad, item #126959
Daffodil Delight Stampin' Write Marker, item #119677
Blender pen, item #102845
Sponge daubers, item #102892
Gingham Garden Washi Tape, item #129314
Flower Shop stamp set, item #130942
Pansy punch, item #130698
     *** SAVE *** Get the Flower Shop stamp set and punch bundle and save 15%! - item #132726
Fabulous Florets stamp set, item #123027
StazOn black ink pad, item #101406


Wednesday, June 26, 2013

Hexagon Punch and Washi Tape Card

Loving the new Washi Tape that Stampin' Up!
has this year and, of course, the hexagon
shaped punch and coordinating stamp set
and embossing folder!
 
 
We made this card at the last Stamp Club
meeting we had.  Lots of different techniques
but definitely still really easy!
 
 
Supplies used:
So Saffron card stock - item #105118
Big Shot die-cutting machine - item #113439
Honeycomb embossing folder - item #129378
Epic Day This and That Designer Washi Tape - item #131269
Six-Sided Sampler Bundle - SAVE 15% when you order the bundle! (stamp set and hex punch) - item #132724
Calypso Coral Classic Stampin' Pad - item #126983
Coastal Cabana Classic Stampin' Pad - item #131175
Smoky Slate Classic Stampin' Pad - item #131179
Bitty Banners framelits dies - item #129267
Rhinestone Basic Jewels - item #119246
 

Monday, June 24, 2013

Welcome Home Birdhouse Candy Holder

This little birdie gets a warm welcome home greeting
every time he returns after a long day of
hunting and gathering for his family.


The Milk Carton Big Shot Die from Stampin' Up! is
the perfect size for making a little birdhouse
candy holder.  One side of the roof is held
shut with a little bit of Sticky Strip tape, but
when used with the Core'dinations card stock,
it becomes repositionable, yet strong enough
to stay closed.

 
Supplies used:
Big Shot die cutting machine - item #113439
Mini Milk Carton Bigz L die - item #117310
Crumb Cake card stock - item #120953
Woodgrain stamp - item #127808
Early Espresso Classic Stampin' Pad - item #126974
1 1/4" Circle punch - item #119861
Window Sheets - item #114323
Fancy Fan embossing folder (for the roof shingles) - item #127751
Core'dinations card stock - item #129956
Stampin' Sanding System - item #129367
Whisper White card stock - item #100730
Primrose Petals Classic Stampin' Pad - item #126858
Fabulous Phrases stamp set - item #120501
Bird Builder punch - item #117191
Epic Day This and That Designer Series Paper - item #130814
uni-ball Signo Gel Pen - item #105021
Itty Bitty Shapes Punch Pack - item #118309
Primrose Petals card stock - item #126841
Basic Pearl Jewels - item #119247
Sticky Strip adhesive tape - item #104294


Wednesday, June 19, 2013

Bloomin' Bouquet

Don't you just love fresh-cut flowers?  Are you
sad when they wither up and you have to
throw them out?  Well, these paper
flowers never die are sure to keep a
smile on your face!
This sweet arrangement is made using 
Stampin' Up!'s Bloomin' Bouquet kit.  
The kit comes with laser cut flowers,
enough for a baker's dozen, and has
floral stems, buttons for the flower centers,
 and labels as well.  All you need is
a cute flower basket or vase to display them in.

Here's a little closer view so you can see
the Faceted Vintage Button centers (included).

Better hurry and get your kit because
they're only available for a limited time
and while supplies last.
Get your kit HERE.  This link
even has a step-by-step video tutorial.

Monday, June 3, 2013

New Catalog Blog Hop - Epic Day Hexagon Card


Welcome to the Blog Hop! I hope you've just come 
from Cali's blog after checking out her project made
from new products from the Stampin' Up! 2013-2014
annual catalog.  You can see the catalog here.
 
Here's my contribution for the Blog Hop:
 
 
Did you notice the little buttons I made at the bottom?
Yes, you read that right, I MADE them!  And so can you!
 
A few of the many new, cool things in this year's
catalog are the Simply Pressed Clay Molds and Simply
Pressed Clay.  There are two molds, one that has
three sizes of buttons and one that has three
sizes of flowers.  It's super fun to make these!


Here are a few more samples of the finished flowers
and buttons:
 
The clay is a white color, and you can
add a few drops of re-inker to color the clay before
you place it in the mold (like the one with the white
arrow pointing to it), or you can color the finished
button or flower with Stampin' Write markers once
it's completely dried.
 
Thanks for stopping by my blog.  I hope you have
fun on our Blog Hop today, and be sure to visit
 
 
Stampin' Up! supplies used:
Pool Party card stock, item #122924
Epic Day This and That Designer Series paper, item #130814
7/16" Trim, item #129287
Chalk Talk stamp set, item #130631 for wood mount, item #130634 for clear mount
Chalk Talk framelits, item #129983
Basic Gray Classic Stampin' pad, item #126981
Simply Pressed Clay Molds, item #131272
Simply Pressed Clay, item #130685
Stampin' Write markers in Daffodil Delight, item #119677, Pool Party, and Calypso Coral

Wednesday, May 29, 2013

Stamp Room Door Decor

This is my welcome each time I enter my craft
room. The vinyl letters at the bottom are taken
from the Stampin' Up! logo they send to you
with your starter kit.


I really love how it turned out. It took me
all of 20 minutes to create it.

The dresses are cut out of the Polka Dot Parade
Designer Series paper using the Dress Up
framelits.

Easy and cute, that's the name of the game!!

Stampin' Up! supplies used:
Polka Dot Parade Designer Series paper - item #126902
Dress Up framelits - item #130101
Big Shot die-cutting machine - item #113439

Friday, May 24, 2013

Hello There ...

Say hello to the new In Colors! They look
like yummy sherbet!
The names are delicious, too!
From left to right you have (top) Pistachio Pudding,
Baked Brown Sugar, Strawberry Slush,
(bottom) Crisp Cantaloupe, Coastal Cabana.

The sentiment is a new one, too, from the new
annual catalog - releasing June 1 YAY! - and the
stamp set is called Happy Day.


There's your sneak peek for today! :)


Thursday, May 23, 2013

Father's Day card using masking technique

How pretty this turned out! The masking
technique really gives it a wow factor!
It looks like you spent lots of time
making it, but only you have to know
you didn't. ;)
Simple instructions: on the Whisper
White card stock, place two long sticky
notes about 2 inches apart. Using a
sponge wedge, sponge about a half inch
in between the placed sticky notes
in a green color. I used Pear Pizzazz.
Sponge the rest of the white space in
between the sticky notes in a blue color.
I used Marina Mist.

Remove the sticky notes and stamp
the Lovely as a Tree stamp in Early Espresso
over the sponged area.

Now you can add the "dad" towards the
bottom and add some pierced lines with
your piercing tool and piercing mat. Voila!

I also added a few leaves on the inside, also
from the Lovely as a Tree stamp set.

This card is a flat card so it will go easily in
the mail, and it's still stunning and perfect
for the occasion!
 
 
Supplies used:
Early Espresso card stock - item #119686
Whisper White card stock - item #100730
Early Espresso Classic Stampin' pad - item #126974
Marina Mist Classic Stampin' pad - item #126962
Pear Pizzazz Classic Stampin' pad - available 6/1 - item #131180
Lovely as a Tree stamp set - item #128655 for wood mount, item #127793 for clear mount
Family Reunion stamp set - RETIRING 6/3 - item #122710 for wood mount, item #122712 for clear mount
Paper Piercing tool - item #126189
Stampin' Pierce mat - item #126199


Pure Gumption Graduation Picture Frame

Need the perfect graduation gift?
How about a picture frame to hold
the memories of the big day.
This is a wooden frame bought at
a craft store for $1. I painted it with
some black acrylic chalkboard paint.

Once the paint dried, I rubbed my Embossing
Buddy on the frame where the sentiment
was going to be placed, inked the
sentiment with a VersaMark ink pad
and stamped it directly onto the frame.
Then I applied Whisper White dry embossing
Powder and heat embossed the sentiment.
The Embossing Buddy powder then just
gets wiped off with a wet paper towel.

The graduation cap is also heat embossed
in Basic Black. I added a rhinestone to the
top for a little more bling. (You can never
have too much sparkle!)

The scallop circle punch and year numbers
use the Silver Glimmer paper and are adhered
with Tombow glue.

I think you'll see more posts from me
using these little frames. They're so fun
to embellish!
 
 
Supplies used:
Wooden frame - non-Stampin' Up!
black acrylic chalkboard paint - non-Stampin' Up!
Pure Gumption stamp set - item #126317 for clear mount, #125315 for wood mount
Silver Glimmer paper - item #124005
Whisper White card stock - item #100730
Basic Black card stock - item #121045
VersaMark ink pad - item #102283
Embossing Buddy - item #103083
White Stampin' Emboss powder - item #109132
Black Stampin' Emboss powder - item #109133
Heat Tool - item #129053
Rhinestone Basic Jewels - item #119246
Big Shot Die-Cutting Machine - item #113439
Typeset Alphabet Bigz dies - item #127553
2 3/8" Scallop Circle punch - item #118874
1 3/4" Circle punch - item #119850
1 3/8" Circle punch - item #119860
Tombow glue - item #110755

Wednesday, May 15, 2013

Flower Tri-Fold Gift Card Holder

Here is another tri-fold gift card holder.  These
are so much fun to make!
 
It's the same measurements as the Masculine
Tri-Fold Card I previously published on my blog.


I embossed the Happy Birthday sentiment with
Pool Party embossing powder.

 
On this one I used little magnetic snaps to
keep the card closed.

 
Some of the supplies used on this card are
retiring soon, so get them while you can!!!
 
 
Supplies used:
Crumb Cake card stock (item #120953)
Very Vanilla card stock (item #101650)
VersaMark pad (clear ink to stamp the "Happy Birthday" and then apply Stampin' Emboss powder - item #102283)
Pool Party Stampin' Emboss powder (item #129398)
Heat Tool (for heat-embossing the Stampin' Emboss powder - item #129053)
Pop-Up Posies Designer Kit (RETIRING MAY 31! - Pool Party flowers - item #131395)
5/8" Flower Trim (for center of flowers - RETIRING MAY 31! - item #126869)
In-Color Designer Printed Brads (Calypso Coral color for center of flowers - RETIRING MAY 31! - item #122940)
2 1/2" Circle punch (item #120906)
1 3/8" Circle punch (to adhere flowers to - item #119860)
Scallop Edge Border punch (item #119882)
3/8" Ruffled Ribbon in Calypso Coral (RETIRING MAY 31! - item #122976)
small magnetic snaps (not Stampin' Up!)
Stampin' Trimmer (item #126889)

Monday, May 13, 2013

Masculine Tri-Fold Gift Card Holder

This tri-fold gift card holder uses just 1/2 of a piece
of card stock!  You get a two-fer!
 
Cut an 8 1/2" X 11" piece of card stock in
half longways so it measures 4 1/4" X 11".
 
Score at 2 1/2" and 6 3/4".  Fold on the score
at 2 1/2" and punch a 2 1/2" circle on the right
side of the card.


Now when you open it, you have a complete
circle.  
 
Fold at the 6 3/4" score line and you can
embellish that flap with whatever
fits the occasion so it will show through
the punched circle.
 
Also add a little something to tuck the
small flap under so it will stay closed, like
I did with the "Party This Way" arrow.


On the inside, add a 1 1/2" piece of card stock
to form a pocket for your gift card and add
a white piece of card stock for you to write on. 


Supplies used:
Island Indigo card stock (item #122923)
Whisper White card stock (item #100730)
Basic Black card stock (item #121045)
Parker's Patterns Designer Series Paper (item #131021)
Party This Way stamp set (retired)
Marina Mist Classic Stampin' ink pad (item #126962)
Daffodil Delight Classic Stampin' ink pad (item #126944)
Cherry Cobbler Classic Stampin' ink pad (item #126966)
2 1/2" Circle punch (item #120906)
1 3/4" Circle punch (item #119850)
1 3/8" Circle punch (item #119860)
Paper Snips (item #108360)
Stampin' Trimmer (item #126889)


Saturday, May 11, 2013

Congratulations! - Quatrefancy

Look at this beautiful new Designer Series Paper!
This is from the 2013-2014 Stampin' Up! annual
catalog.  It's called Quatrefancy, and there's a whole
suite designed around it.  Can't wait till May 31
when the catalog is available for everyone
to order from.  Such cute, cute, cute stuff!!!


The "Congratulations" is from the current catalog, the
Sassy Salutations stamp set.  I love the font on these
stamps.  So ... well, SASSY!!!  :)
 
 
Supplies used:
Whisper White card stock (item #100730)
Quatrefancy Specialty Designer Series Paper (item #130141) (available May 31)
Tangerine Tango ribbon (retired -- from the last Sale-A-Bration)
Sassy Salutations stamp set (item #126705 for wood-mount and item #125707 for clear-mount)
Island Indigo Classic Stampin' ink pad (item #126986)
Tangerine Tango Classic Stampin' ink pad (item #126946)
Rhinestone Basic Jewels (item #119246)

Thursday, May 2, 2013

Mother's Day Bookmark Card and Chocolate Gift

This little card is multipurpose!  I love that!
It's a card with a bookmark attached to it
that can be removed and used and treasured
each time a book needs a placeholder.  :)
 
 
The matching chocolate gift is the large scallop
circle Bigshot die folded like an envelope.

 
The bookmark is made with the Two Tags
Bigshot die and held onto the card with
little magnetic snaps.


When you use the bookmark (on your favorite Stampin' Up!
catalog of course!) place a couple of pages
in between the magnets and your flower peeks
out at the top.

Tuesday, April 30, 2013

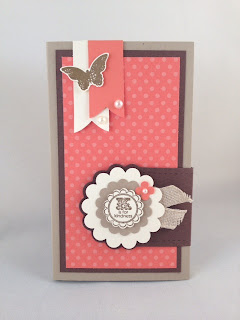
Calypso Coral Sticky Note Holder

Can you say hooray for Calypso Coral!!
I'm so excited that with the recent Color
Refresh, Stampin' Up! has decided to
keep Calypso Coral and add it to the
Subtles family.  It would otherwise
have been retired, as it is one of the
2012-2013 In Colors.
 
 
This little book holds a long sticky
note pad.  It's Crumb Cake card stock
with a Chocolate Chip mat and Calypso
Coral polka dot Designer Series Paper mat.
 

The clasp is made with the Two Tags die (retiring,
so get it fast before they're all gone!) and some tiny
button magnets.
 
Super cute and easy and makes a great little
gift for a teacher or friend for Mother's Day.
I had one friend who's a 2nd grade teacher say
she was going to have her students make them
in class to give to their moms for Mother's Day.
What a sweet idea!

Thursday, April 4, 2013

Wooden Board Picture Frame

Who would have ever thought a simple 2" X 8" X 8' piece
of wood could make 12 super cute picture frames?


Yep, that's right.  Go to your local home improvement
store and get one board measuring 2 inches by 8 inches
by 8 foot long, have them cut it into 12 equal pieces
of 8 inches.  Then you have 12 pieces of wood
that are 2 inches by 8 inches by 8 inches.
 

When you get them home, give them a rough sand
to remove any loose splinters and make the wood ready
to paint.  Spray each piece with your desired
color of spray paint.
 
 
Once painted and completely dry, give another rough
sand to give achieve a distressed look.


Now you'll need some Mod Podge (can be purchased at a craft store),
a sponge applicator, and some Designer Series Paper cut
to fit the front of the frame.  I cut mine at 6 5/8" by 7 1/4".

 
Apply a coat of Mod Podge directly onto the wood block.


Adhere your Designer Series Paper on top
of the coat of Mod Podge.  Press all over the
paper to make sure it's glued down well,
especially the edges.

 
Apply a top coat of Mod Podge.

 
Let it dry for about 15 minutes or so.  Or if you're
impatient like me, you can dry it with a hair dryer
or a craft heat tool, making sure not to hold the
dryer or heat tool in one place too long, but keep
it moving so you don't burn the Mod Podge or the
paper.

 
If you find that your paper is bubbling
up, you can run a brayer over it to flatten
it back out.  Most of the bubbles
will disappear as the Mod Podge dries,
but it also helps to use a brayer.

 
Make sure the Mod Podge is pretty dry
before using the brayer.

 
Apply up to 5 coats for a high-gloss finish,
waiting 15-20 minutes between coats to
allow for drying time.

Once all coats of Mod Podge are completely dry,
use a power drill to insert a wood screw
towards the top of your frame.  
 
 
Now you have something metal for a magnet to
cling to.  You can find cute magnets at an
office supply store or any big box department
store with an office supply section.
 
 
Here is what the completed frame will look like.


You can also embellish with a fabric flower.

 
Or you can leave off the Designer Series Paper and
embellish with a stamped sentiment and fabric flower.

 
On this frame, I turned the wood block so it's oriented to a
landscape size, with the cut edges to the left and right of the
frame rather than to the top and bottom of the frame.